To start using the annasta Woocommerce Product Filters WordPress plugin, you have to install and activate it. Go to the Plugins > Add New section of your WordPress admin page, and enter “annasta filters” into the plugins search box. In the search results list, click the Install Now button for the annasta Woocommerce Product Filters. Activate the plugin when the installation is complete.
For further instructions on the ways to install a WordPress plugin please refer to the WordPress official Plugin Management Guide.
annasta Woocommerce Product Filters needs to run alongside the WooCommerce plugin to function properly.
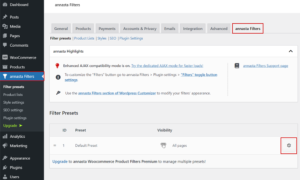
Once you’ve successfully installed and activated the plugin, navigate to the “annasta Filters” tab of the WooCommerce > Settings menu page. You can also go directly to the plugin settings by clicking on the “annasta Filters” option of the WordPress sidebar menu, or by clicking the Settings link under the plugin name of the Plugins admin page (see image 1).

Editing preset settings
In order to setup the filters for your WooCommerce shop you will need to edit the default filters preset that has been created for you during the plugin installation. Open the preset options by clicking on the Edit preset (cog) button of the Default Preset.

Help tips can assist you in editing the preset options. To read a tip, bring your mouse pointer to (or tap on) the black circle with the question mark near the option in question.
Display options
Please pay attention to the Visibility setting of the “Display options” section! The pre-installed Default Preset is set to be controlled by “Filters” toggle button, and opens the filters in a modal pop-up sidebar.
If you wish to display your preset in a regular sidebar or header container, please change the Visibility to Visible, and remember to place the preset into the relevant section of your site.

To disable the floating mode of the “Filters” button, uncheck the Fix the “Filters” button page position setting. More “Filters” button options are available in the annasta Filters > Plugin settings > “Filters” toggle button settings section and the annasta Filters Customizer (see Appearance > Customize).
Setting up the display pages
Our plugin offers you the flexibility of defining the site pages on which the filters are going to be displayed.

You will specify the display pages for your preset in the Display on section of the preset settings page. By default your filters are set to display on all pages, but you can change that at any time by adding and removing page associations. To delete an association click on the Remove page association button next to it. Add another page by selecting it from the dropdown and clicking on the Add page association (+) button.
Please keep in mind that whenever your preset is displayed on a page that is not an official WooCommerce products archive page (shop/ taxonomy archive page) or a Woocommerce [products] shortcode page registered for filtering, the filters will act as simple links to the corresponding filtered results of the shop page. For example, if you have a product colors filter displaying on a Shopping Cart page, clicking on “red” will open your shop page with products filtered by the selected color (in this case, red).
Click here to read more about the usage of the Display on section of your preset settings.
Managing your filters
All the available filters are listed in the select box under the Preset Filters section title. You can add, delete and re-add your filters at any moment. Filter open/ collapse buttons are provided for your convenience in the right corner of the filter title bar, as well as at the bottom of an opened filter. Use the drag-and-drop technique by grabbing the filter by its position label (in the left corner of the title bar) to change the filter’s position in the preset.

Whenever you wish to add additional filters or controls to your preset, select the needed one from the dropdown under the Preset Filters section title and click the Add filter (+) button.
Editing filter options
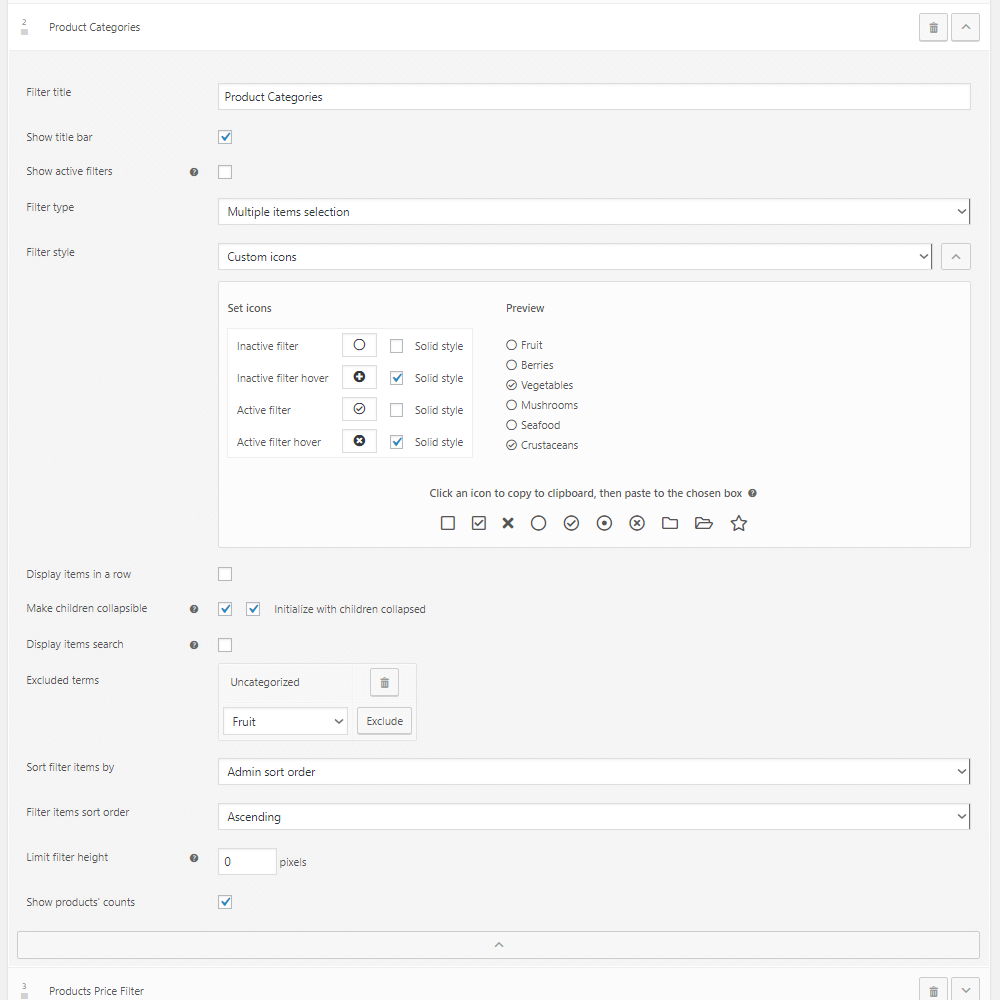
To illustrate the filter options setup, let’s assume that we added a Product categories filter (see image 7).
One of the first things that you have to decide when creating a filter is whether you want it to be a single-select, or a multi-select filter. In a single-select filter only one item can be selected at a time, whereas in a multi-select filter, you and the visitors of your shop will be able to select multiple filter terms.
To explain this on our product categories filter example, if you choose the single item selection Filter type, it will be EITHER the Tshirts category, OR the Hoodies category that will be getting selected by clicking on them at any given time, while a multi-select filter type will allow the selection of BOTH Tshirts AND Hoodies (as well as Accessories etc) categories at the same time.
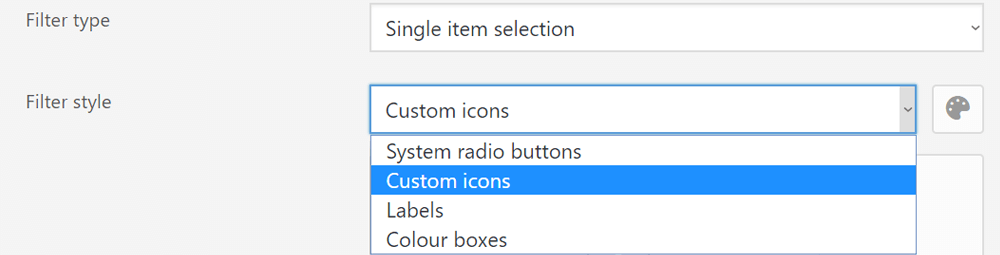
Select Multiple items selection for the multi-select filters, or Single item selection for the single-select filters in the Filter type field.
The Products Price and Products Rating filters will have their Filter type option limited to the Range selection type. Please refer to the corresponding article of the plugin documentation for the detailed description of a range filter setup.
After having decided on the filter type, you can move on to choose the Filter style. Here you have a variety of options to choose from, ranging from the standard browser radio and check-box controls, labels, tags, and color boxes, to setting Font Awesome Free icons to display as filter icons in front of your filters.
Additionally, you can set the filter items to display in a row (which can be used for color boxes and tags), display a filter items search box on top of the filters, and limit the height of the filters list container (in this case a vertical scrollbar will appear if the list of filter items spreads further than the specified height, to allow your visitors to scroll through the list. You can also enable the “pretty” scrollbars for such cases in the Styles section of the annasta Filters settings page) .
Another useful feature of the annasta Woocommerce Product Filters plugin is the Filter items control option. Use it to remove the unneeded terms (such as the “Uncategorized” product category) from the list of your filter items, or manually create the list of filter options. You can also set the Filter items control into the Active filters mode, to only display the branches of the active options (for example, the currently selected category with its sub-categories).
Check the corresponding option if you wish to display product counts for the current filter.
Don’t forget to save the preset settings each time you make changes by pushing the Save button at the bottom of the page.
Inserting preset into the site
You don’t need to insert presets set to the Controlled by “Filters” button Visibility, this setting will enable the automatic “Filters” button support.
To place your preset into a regular sidebar, header or other page element, make sure that its Visibility isn’t controlled by the “Filters” button, and select among the following ways of insertion:
- annasta WooCommerce Filters Guttenberg block is available in the Appearance > Widgets section of your WordPress admin, as well as in any Guttenberg page editor,
- The [annasta_filters preset_id=1] shortcode can be used both in editors and widget areas,
- The old annasta WooCommerce Filters widget can still be used in the Appearance > Widgets section of your WordPress admin,
- (advanced) The Add elements section of the annasta Filters > Product lists admin tab provides an additional tool for preset insertion with the help of common WooCommerce hooks,
- (advanced) Direct insertion into page templates with the help of PHP code.
annasta WooCommerce Filters Guttenberg block
Since version 1.5.5 of the plugin (with sites running WordPress 5.8 or later) you can use the annasta WooCommerce Filters Guttenberg block, both inside of the WordPress page editor, and in Appearance > Widgets.


The [annasta_filters] shortcode
The [annasta_filters preset_id=1] shortcode is another way to insert an annasta filters preset into the pages and sidebars of your site. Set the preset_id parameter to the needed preset id.
Shortcode Widget
Add the “Shortcode” widget to the chosen section of your site and type in the annasta_filters shortcode with the needed preset id.

Inserting the shortcode programmatically
Use the do_shortcode function in the PHP code of your pages to insert your filters presets into page templates, directly or via the WordPress or WooCommerce hooks. Here is the example of code that will display preset id #1:
echo do_shortcode( '[annasta_filters preset_id=1]' );
annasta Woocommerce Product Filters Widget
Prior to WordPress 5.8 annasta widget was the easiest way to place your filters into the site. You can still use it, though please keep in mind that it may be deprecated in favour of the annasta WooCommerce Filters block at some point in the future.
To use the widget, go to the Appearance > Widgets screen of your WordPress admin and find the annasta WooCommerce Filters in the list of the available widgets. In WordPress 5.8 and later the widgets are located in the Legacy Widget group.
Select the annasta Woocommerce Product Filters Widget from the Legacy Widget dropdown, or type in “annasta Filters” in add widget search box to find the widget, and click on it to add it to page element. Select the needed filters preset in the Filters Preset field of widget options and push the Update button of the Widgets screen.
Classic Widgets editor
Prior to WordPress version 5.8, the Widgets Editor had a different interface. You can still use it in the newer versions of WordPress by installing the Classic Widgets plugin.

To add the annasta Woocommerce Product Filters Widget to the needed widget area in the Classic Widgets editor, drag and drop the widget into the chosen section of your site and make sure that the needed filters preset is selected in the annasta Filters Preset field of widget options. Click Save when you are finished, and open the page of your site that contains the widget area to test the filters.
We hope that this tutorial was helpful in guiding you through the first steps of your Woocommerce shop filters’ setup. For further information about all the variety of functions and options of our plugin please consult the plugin documentation.